
Continuing my quest to make Animated Step-by-Steps® as therapeutic as possible for as wide a
range of students as possible, I’ve discovered a strategy for heightening interactivity by adding
voice-output to key symbols on the page. As you can see in the
illustration below, four key symbols (ringed in red) have been modified to
provide added voice-output. When the adult is ‘reading’ the symbols of the
poem, he/she can pause at the red-ringed symbol, allowing the child to
press/click the cell to add that key word to the flow of the shared reading
experience.

In beta versions of the Animated
Step-by-Steps® I always created files that included both a ‘non symbol-supported’ version AND a ‘symbol supported version’. In the
symbol-supported version, we routinely ‘attached’ voice-output to a few key
symbols on the page, to allow students who were cognitively young to participate in the process of ‘reading' collaboratively using the symbols.
I eventually abandoned the ‘two-version’ format to embrace
the more efficient strategy of adding the symbols AFTER all the page animations
were completed. This allowed the upfront emphasis to be placed solely on literacy.
Once the symbols magically appeared at
the end of the animation sequence, they were readily available to
- re-read the page using the symbols, or
- conduct Aided Language Stimulation.
Recently (insert Duh here!) I realized that I can select a single symbol
within that group of symbols and assign voice-output to the symbol (even though
it resides within a group that has been animated). Here are the simple steps to
accomplish this task (Note: it may look different if you are using a Windows/earlier version of PowerPoint):
- select
the symbol group, then select the target symbol within the symbol group
(look closely, you should see a small box, within a larger box)


- right click (control click for the Mac) on the selected symbol to access action settings in the drop down menu;

- select (i.e., check box) play sound;
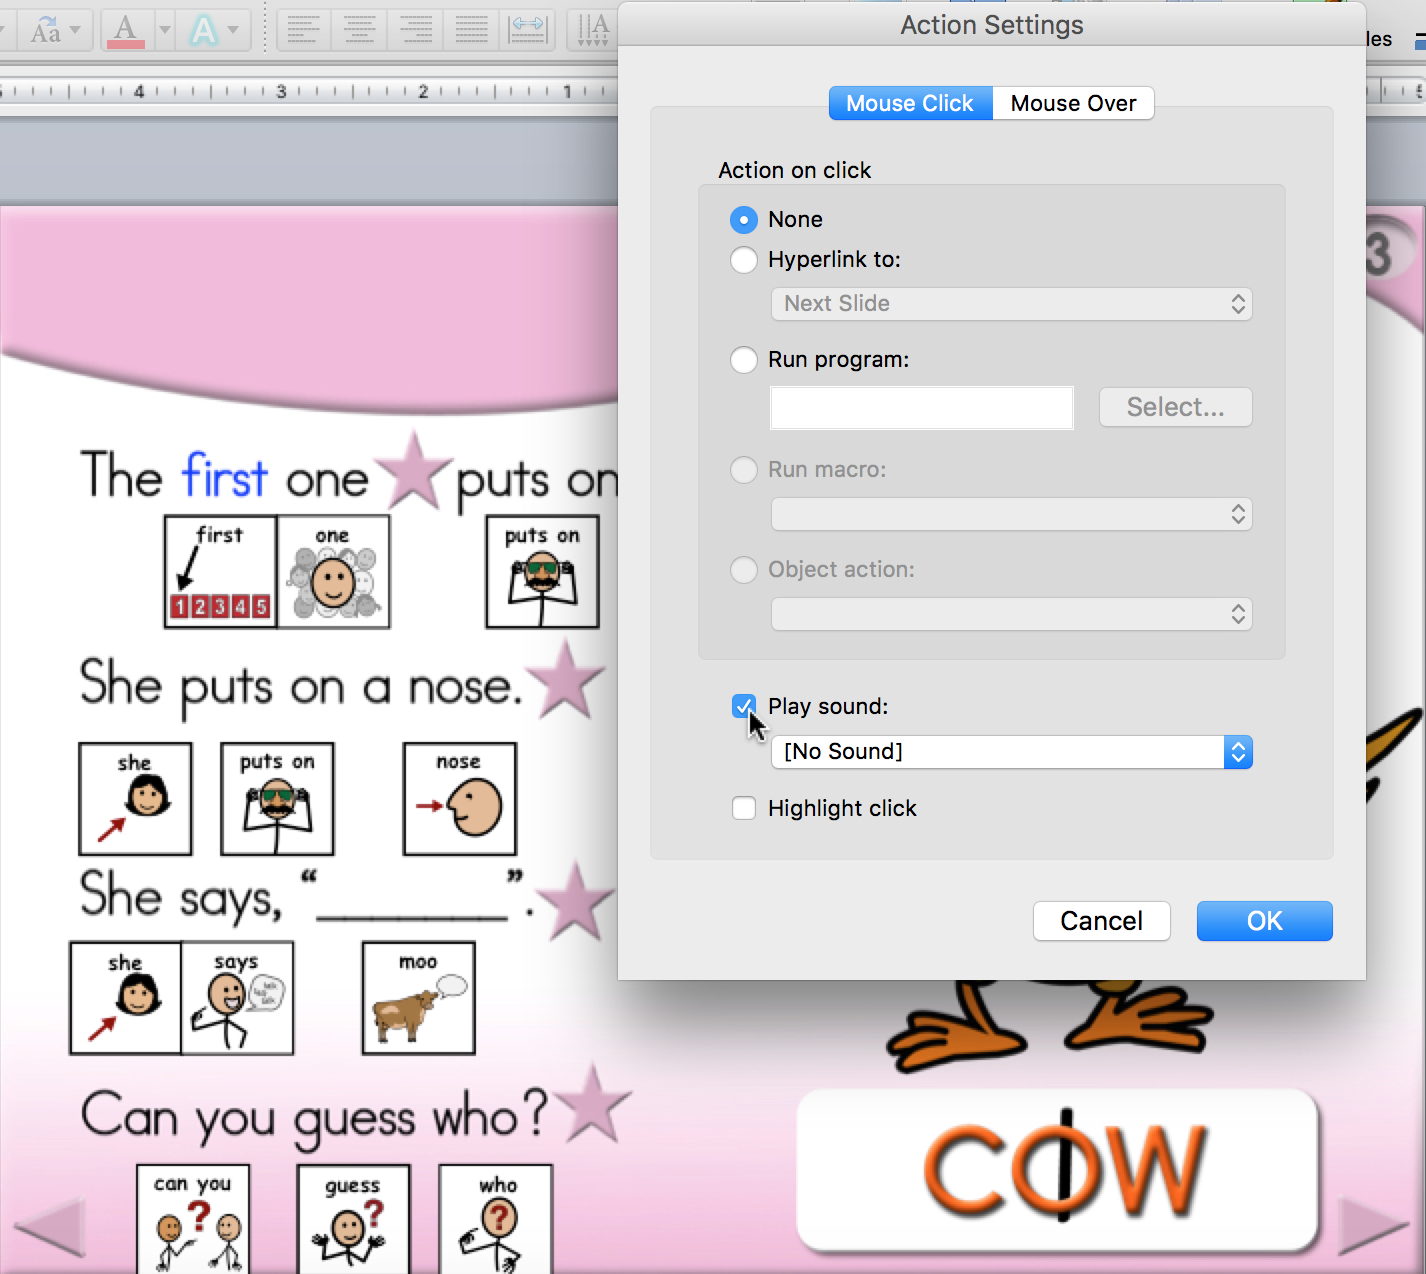
- use the drop down menu and select other sound (bottom of the list) then navigate to a pre-recorded sound that you have stored somewhere on your computer. I usually record my spoken labels using a free open source program called Audacity. Audacity has various filters called Effects that allow me to simulate a child’s voice (e.g. increase pitch by 20%). This will be discussed in a future post.

To make the symbol more salient on the page add a red dotted ring to indicate which symbols are capable of producing voice-output.
- select the symbol group then select the target symbol within the symbol group (look closely, you should see a small box, within a larger box)
- right click (control click for Mac) to access format picture in the drop down menu
- select line
- change the line option from no line to the color red and under line effects make it a thin dotted line -------.

How does this ‘added
voice-output’ work clinically?
General Information:
The facilitator reads the text punctuated with animations,
then rereads the page using the symbols.
Whenever she reaches a red ringed symbol she provides an ‘expectant pause’ i.e., she leaves a space for the child to fill. For students who are cognitively young this provides
a great participatory role!
Specific
Information:
If using an iPad …
The child is swiping to the left (or touching an imaginary
bar on the far right) to trigger the animations and touching the red-ringed symbols
on the iPad screen to trigger the voice-output of the ‘red-ringed symbols’.


If using a switch
(wired directly to the interactive whiteboard computer via a Switch Interface Pro for example) …
The secondary facilitator (e.g. classroom assistant, personal assistant, SLP seated with the child) is placing the cursor on the ‘red ringed’ symbol and waiting for the child to activate their switch to add the collaborative voice-output. This may also be a good time to use the ‘safe zone’. (http://bit.ly/22rLX5p)
Now we have two ways
to engage students that are cognitively young in our group lessons.
They can be more actively involved in the lesson by
- triggering animations, and/or
- collaborating in the process of ‘reading symbols’ by activating the red ringed symbols.
…’til the
next post … (new posts every Monday)
Follow me on
twitter www.twitter.com/@AnimStepbySteps
Email
me canadiangoosse@gmail.com
©2016 Carol
Goossens’, Ph.D.
Augmentative
Communication Consultant
Speech-Language
Pathologist
Special
Educator