
As indicated in previous posts, you can, with a little bit
of effort, personalize some of the ASbyS poems/songs/stories for your students
by substituting their ‘photo faces’ for the illustrated faces in the purchased
document.


When working as an AAC consultant, I have frequently started
the school year creating ‘photo faces’ for each child in the early grades (PreK
through 4). These digital ‘photo faces’ with their transparent backgrounds were
primarily used to create the class page needed
for various personal communication devices, but they also served ‘double duty’
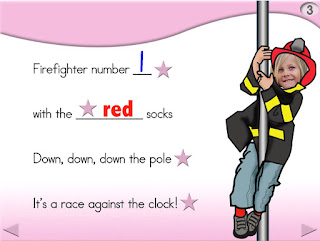
in writing projects, crafts activities and yes … personalizing Animated
Step-by-Steps™.
An ideal ‘photo face’ has a transparent background allowing it to be fully integrated with
other graphics on a page. In a previous post you received information on how to
use the change picture feature of
PowerPoint to substitute photos of your students. This post will discuss the basic photo editing tools needed to create
‘photo faces’.
Take the pictures
First take a close up picture (head and shoulders) of every child in your class. Use your Smart
Phone camera as you can easily email the photo(s) to your computer to more
easily edit your images. Be sure to take the picture in front of a white/light wall.
The solid white/light background makes it much easier to edit out the
background of your photo. If you don’t have a white/light wall, tape a piece of
white poster board on the wall behind the child’s head. If the child is in a
wheelchair ask a colleague to hold the white poster board behind the child’s
head while you take the picture.
Import the picture
into a photo-editing program
On your computer, import the photo into a photo-editing
program, such as Adobe Photoshop or Adobe
Photoshop Elements (I’m sure there are other software programs that will
work just as well). Most common photo
editing programs have the tools you need:
crop tool, magic wand and polygonal/lasso tool.
Crop the image

I like to crop the image first. This eliminates excess background information that needlessly increases your file size.
Select the
background
 Use the ‘magic wand’ tool to
select the white background you wish to remove (a dashed line will appear around
the selected area). If a click in the background only selects a portion of the
area due to shadows, hold down the shift
key and keep clicking additional areas until the entire background has been
selected, then select delete to drop
out the background. A gray-checkered pattern will appear; your background
Use the ‘magic wand’ tool to
select the white background you wish to remove (a dashed line will appear around
the selected area). If a click in the background only selects a portion of the
area due to shadows, hold down the shift
key and keep clicking additional areas until the entire background has been
selected, then select delete to drop
out the background. A gray-checkered pattern will appear; your background is now transparent.
Remove the area
under the chin
 Use the polygonal lasso tool (circled in blue
on toolbar) or the eraser tool to
remove the area under the chin. When using the polygonal lasso tool you will be
making a series of close clicks along the path you wish to select.
Use the polygonal lasso tool (circled in blue
on toolbar) or the eraser tool to
remove the area under the chin. When using the polygonal lasso tool you will be
making a series of close clicks along the path you wish to select.
Save your final image as a .png, as this format maintains the transparent background.
I usually save the image at 150 dpi with a vertical size of
3”. Depending upon the project, this size gives me the flexibility of being
able to enlarge the images considerably without too much degradation
(pixelating) or reduce the image size in keeping with the size needed for my
ASbyS personalization project.
Using PowerPoint
You can also use PowerPoint to drop out the background.
Drag the cropped image on to a blank PowerPoint page. Select the Format Picture tab then choose the Remove Background option. A selection
box will appear that should be adjusted to delineate the area that you wish to
keep. The pink area denotes the area that will be deleted; the ‘non-pink’ area
is the area that will be maintained. When you click back on the Remove
background icon, it will remove the pink area.

These instructions might not be a
perfect match for the photo-editing program or PowerPoint version that you will
be using, but hopefully they can at least ‘point you in the right direction’,
giving you a better idea of the types of tools to look for in your photo-editing
program.

…’til the next post … (new posts every Monday)
Visit my website http://www.animatedstep-by-steps.com
Follow me on twitter @AnimStepbySteps
Follow me on twitter @AnimStepbySteps
Follow me on facebook www.facebook.com/AnimatedStepBySteps
Follow my blog http://animatedstepbysteps.blogspot.com
Email me canadiangoosse@gmail.com
Visit my digital store http://teacherspayteachers.com/Store/Bloom
©2016 Carol Goossens’, Ph.D.
Augmentative Communication Consultant
Speech-Language Pathologist
Special Educator


